
After your charity claim is approved and your organization becomes Active, the next step is to complete your charity profile. This ensures your organization can host projects that receive donations and build trust with supporters.
How Your Charity Profile Works
Your charity profile is the foundation of your organization on Charity Bridge Fund. This is where you provide key information about your nonprofit before creating projects.
Your profile is made up of four sections:
Share your organization’s mission and basic details to give donors context
Set up how your organization will receive donations
Create and manage initiatives where you tell your story and activate donation opportunities
Track contributions, view details, and download reports
While completing your charity profile is an important step, donations are made through projects. After setting up your profile, you will need to create and publish a project to start receiving support.
Understanding Profile Indicators
As you complete your charity profile, you’ll see visual indicators that guide your progress:
Red mark: This section has missing required fields
Green mark: This section is complete
Asterisks (*): Required fields needed to publish your charity
Character bars: Help you stay within the recommended length for text fields
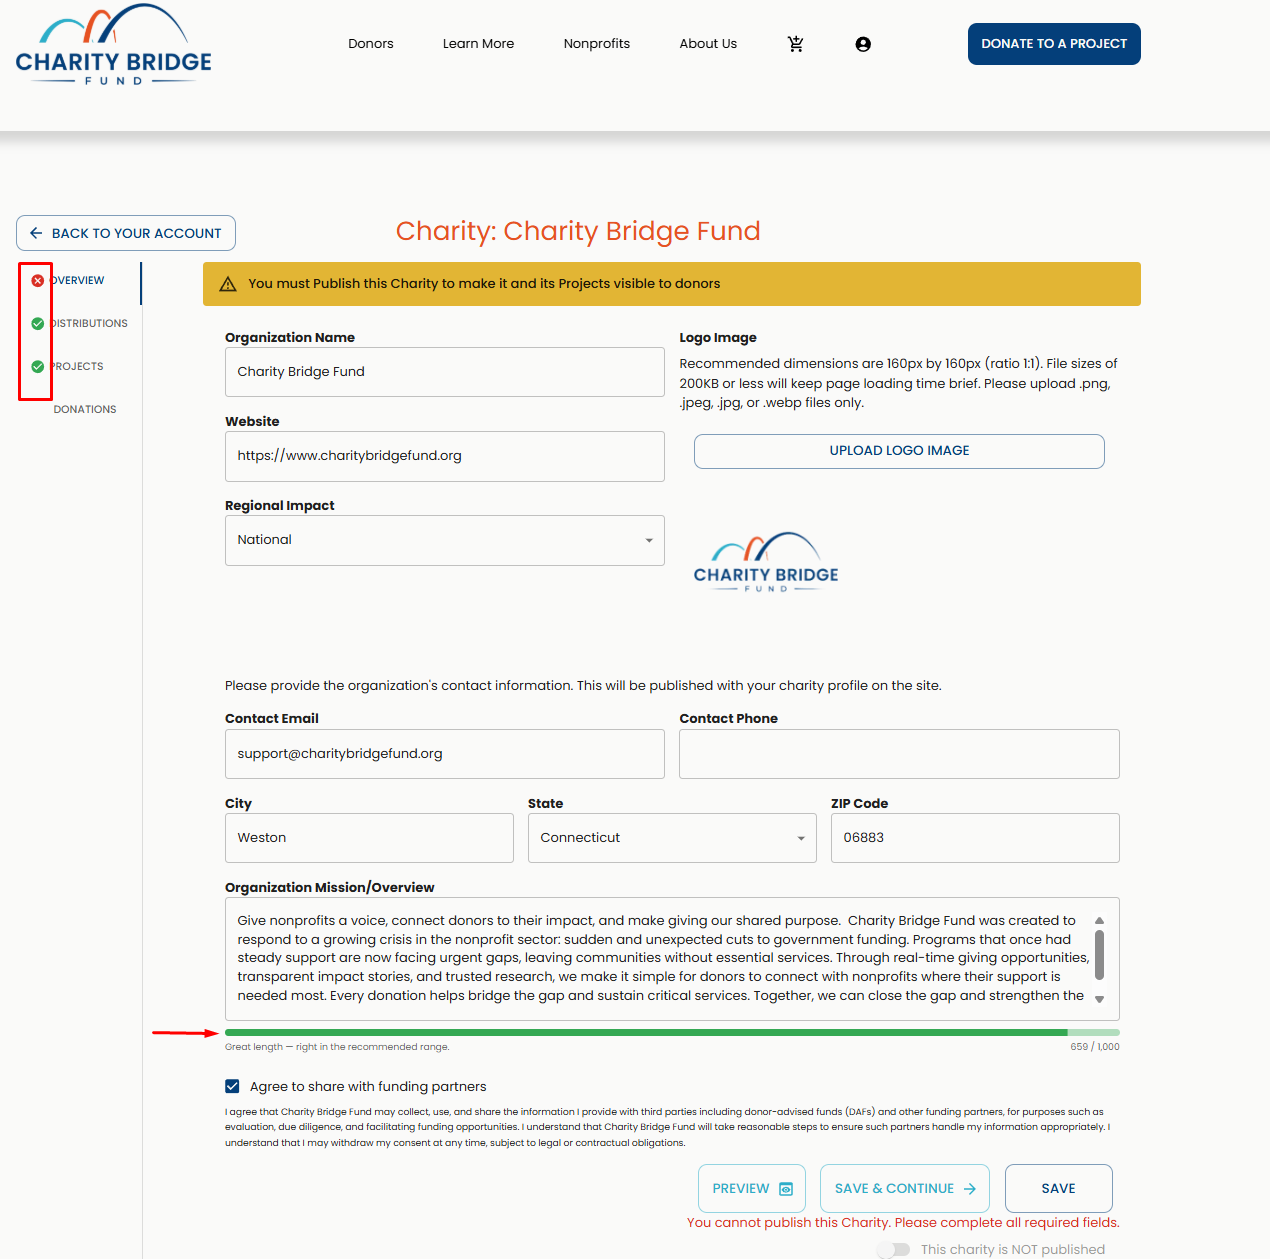
These indicators are designed to help you complete your profile accurately and ensure your organization is ready to be published and discovered.
Accessing Your Charity Profile
To begin setting up your charity:

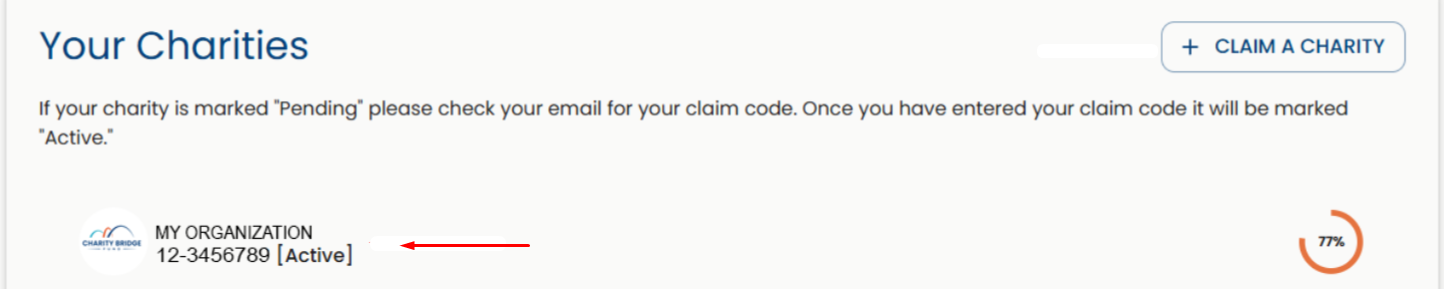
Log in to your My Account dashboard.
Select the active nonprofit organization you want to edit from the "Your Charities" section.
Navigate through each section and fill in the required information.
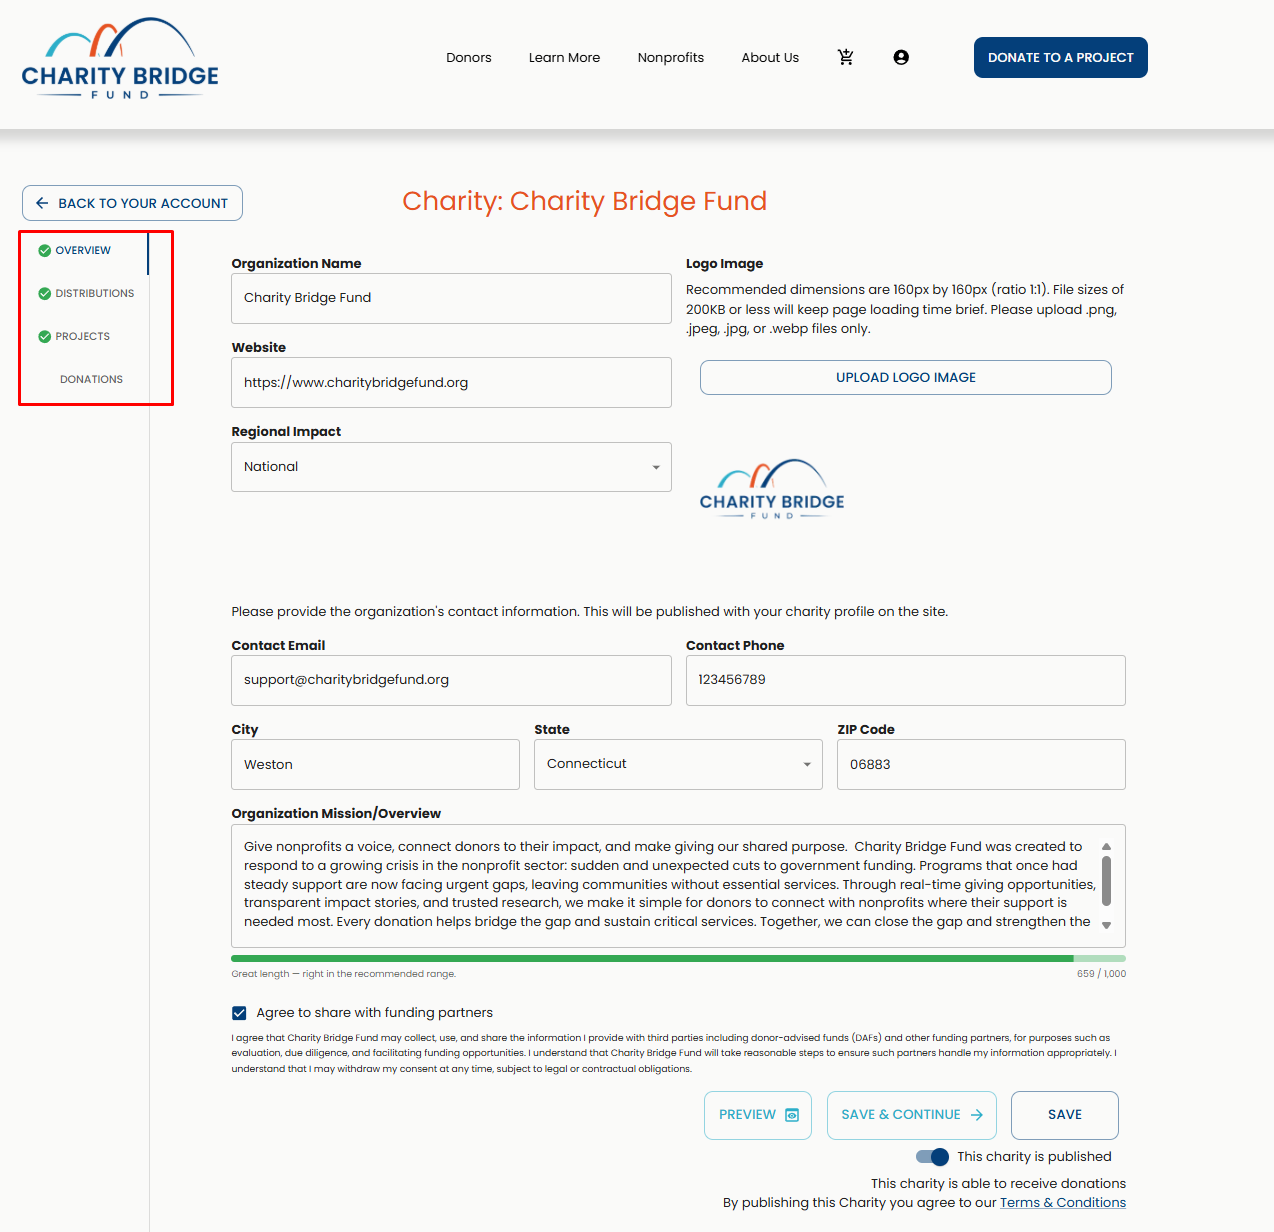
Overview Page
The Overview page contains your organization’s core public information. This is one of the most visible sections for donors.
Organization Details
Organization Name: Enter your legal or publicly recognized name
Website: Add your official website URL
Regional Impact: Select your geographic scope (local, regional, national)
Image Requirements
Upload a clear, high-quality logo that represents your organization.
Aspect ratio: 1:1 (square)
Recommended size: 160 × 160 px
File size: 200KB or less
Formats: PNG, JPG, JPEG, WEBP
For more guidance on image sizing, formats, and upload tips, see:
Contact Information
Provide contact details that donors can use to reach your organization. This information will be publicly visible.
Mission and Overview
This section combines your mission and summary into one field. Clearly explain:
Who you serve
What your organization does
Why your work matters
Distributions Page
This section is required to enable your organization to receive donations.
The Bill.com Requirement for Distributions
Charity Bridge Fund partners with Bill.com to distribute donations.
To activate donations:
You must have a Bill.com account
You must enter your PNI (Payment Network ID)
If this step is incomplete, we will not be able to distribute donations made to your organization. For help with the distribution setup and your Payment Network ID, see
Distribution Contact
Enter the details of the person responsible for managing distributions. This contact can be different from your main contact, will not be publicly visible, and will be used for notifications or if we need to reach out regarding fund distribution arrangements.
Projects Page
The Projects section is where your organization brings its work to life. This is the most important part of your setup, as donations are made through projects, not your main charity profile.
Projects allow you to present specific programs, campaigns, or funding needs, helping donors clearly understand what they are supporting.
From the Projects page, you can:
Create new projects to highlight specific initiatives
Manage and update existing projects
Share detailed stories, goals, and funding needs
Activate donation capabilities by publishing a project
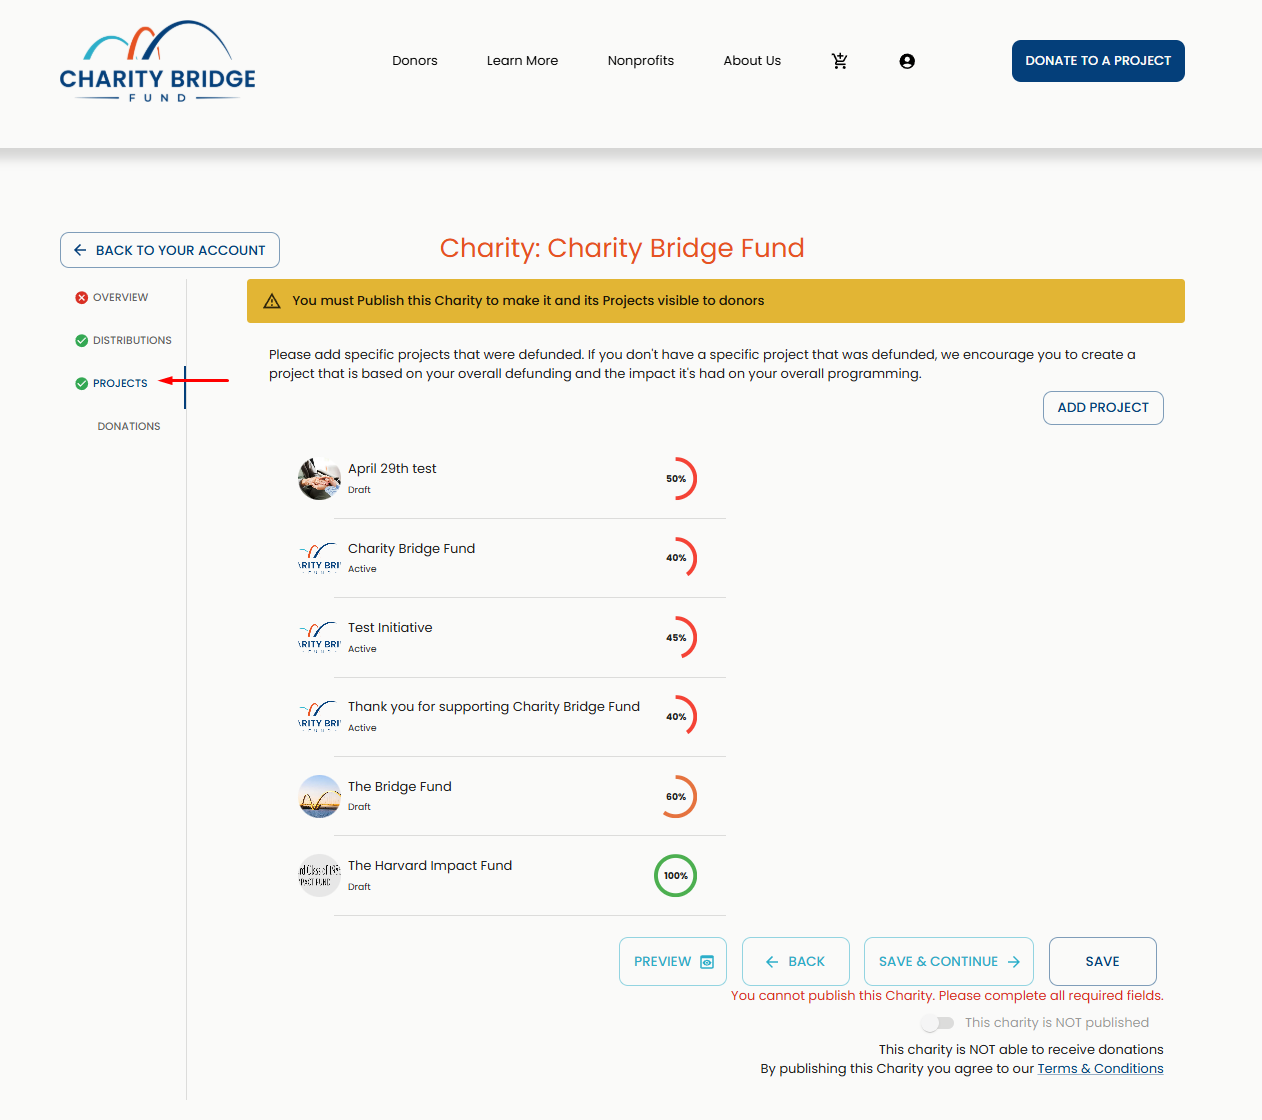
Without a published project, your charity will not be able to receive donations, even if your profile is complete.
Donations Page
The Donations page provides a full record of contributions made to your charity. From here, you can:
View all donations received
Filter by month
Access transaction details (amount, fees, donor info, status)
Track distribution status (pending or processed)
Download a CSV report
Final Tips
Completing your charity profile thoroughly improves visibility and credibility on Charity Bridge Fund.
Use clear, concise language
Upload high-quality images
Complete distribution details
Create a project
If you need help at any stage, contact our support team at nonprofits@charitybridgefund.org.
FAQ
What happens if I don’t reach the recommended character range?
You can still save your profile, but shorter descriptions may give donors less context about your organization. Use the character guidance to make your profile clear, complete, and easy to understand.
What happens if I leave required fields blank?
Some fields are required to publish your charity or enable donations. If required information is missing, your profile may remain incomplete or unavailable for public visibility until those fields are completed.
What if I upload an image that doesn’t meet the requirements?
Images may appear distorted or fail to upload if they don’t meet size or format guidelines.
Where do I choose categories?
Categories are selected when creating or editing a project, not during charity profile setup. This helps each project reflect its specific purpose.
Why can’t I receive donations yet?
Donations are made through published projects, not the main charity profile. To receive donations, your charity profile must be complete, your distribution details must be set up, and at least one project must be published.
What if I upload an image that doesn’t meet the requirements?
Images may appear distorted, blurry, cropped incorrectly, or fail to upload if they do not meet the recommended size, format, or quality guidelines.
Completing your charity profile is an important first step in building trust with donors and preparing your organization to receive support. Once your profile details, distribution information, and public-facing content are complete, the next step is to create and publish a project so donors can understand your funding needs and contribute through Charity Bridge Fund.